|
|
|
|
My Details
|
|
Details
|
Displays your user name, user type, telephone extension, and membership with any user groups (departments) or agent groups (for servicing queues).
|
|
Change Password
|
Not available if you logged in using single sign-on.
Use this to change your DTA log in password. See also, Change Your DTA Login Password.
|
|
My Contact Card
|
Use this to, optionally, enter your personal contact information.
Any numbers you enter here can be quickly selected for setting up a personal hunt group (see Twinning below) and call forwarding (See Divert Calls below).
Phonebook users can also add a note (such as out of hours message) for display to all Phonebook users.
|
|
|
My Telephone Device
|
|
Speed Dials
|
Use this to set up speed dial shortcuts by assigning telephone numbers to them. See also, Configure Speed Dialling.
|
|
Twinning
|
Use this to set up a personal hunt group of numbers so that whenever you receive a call, the devices on these numbers ring in parallel or in sequence until you answer one of them. See also, Create a Personal Hunt Group.
|
|
Divert Calls
|
Use this to create call forwarding rules to suit your personal schedule. A call to your phone can be diverted to other destinations such as to other numbers, treatments (hunt groups and queues), and voicemail. See also, Configure Call Forwarding.
|
|
Screening
|
Use this to block incoming calls from particular telephone numbers. No message is displayed to blocked callers. See also, Block Calls From Selected Numbers.
|
|
Hardphone Settings
|
Use this to view and edit the pairing details (star code and security code) you use for logging in to your storm-registered deskphone. See also, Change Your Deskphone's Star Code and PIN.
|
|
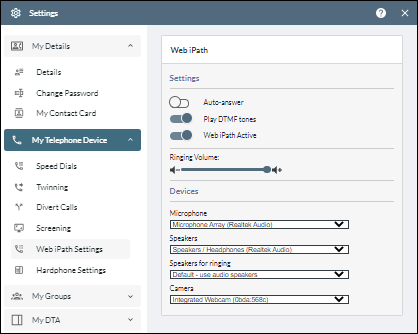
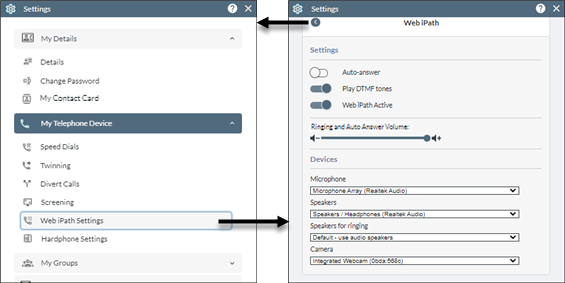
Web iPath
|
If you are configured to use the DTA Web iPath telephone device for making and receiving calls, use this section to control Web iPath settings such as auto-answer and the use of audio visual devices. See also, Change Your Web iPath Settings.
|
|
PSTN-Paired Settings
|
Reserved for future use.
|
|
|
My Groups
|
|
|
My DTA
|
|
Emergency Alerts
|
Use this to select the device out of which the audio for emergency alert messages should be played and to control the volume of the audio. See also, Send or Respond to an Emergency Alert.
|
|
Add to Contacts
|
Create personal and external contacts. These subsequently appear on your Contacts Tab. Personal contacts are visible to you only, whilst external contacts are visible to all users in the organisation. See also, Create Personal and External Contacts.
|
|
Notifications
|
Use this to enable or disable pop-up notifications (for example incoming calls and chat messages) generated by your web browser.
Note: if you are enabling notifications, ensure that your browser is configured to display notifications.
|
|
Sentiment
|
Supervisors only
Allows you to change the sentiment threshold value, which determines the approximate value that will trigger negative sentiment alerts in live audio conversations reported in the Monitor Agents panel. Your change will not affect other supervisors. See also, Listen to a Live Agent Conversation.
|
|
User Chat
|
Enable this setting if, during an internal user-to-user chat, you want the keyboard Enter key to send messages rather than start a new line in the messages. See also, Chat to One or More Users.
|
|
|
User Management
|
|
|
Status Management
|
|
|
Message Templates
|
|
Templates
|
Use this to create, edit, and delete message templates. A message template is a snippet of text that DTA users can quickly insert into their email, SMS, web chat, and social media messages to save time and effort when interacting with contacts. See also, Create a Message Template.
|
|
Template Categories
|
Supervisors only
Use this to restrict the visibility of message templates to particular agents. See Create a Message Template Category.
|
|
Bulk Upload Templates
|
Supervisors only
Use this to upload lots message templates in a single operation. See Bulk Upload Message Templates.
|
|
Dropdowns
|
Supervisors only
Use this to create template dropdowns for use in your message templates. See Create Message Template Dropdowns.
|
|
Dropdown Categories
|
Supervisors only
Use this to create template dropdown categories for use in your message templates. See Create Message Template Dropdown Dropdown Categories.
|
|
|
Phonebook Management
(Phonebook users only)
|
|
 button on the Toolbar.
 button, or click anywhere outside the window within the main application window.
 displays this Help page. Clicking
  closes the window.