Control Queue Routing On The Basis of Available Agents
Supervisors only
You can control a queue's routing to an agent group on the basis of the number or range of available agents in that group. For example, you may decide that contacts should not be routed to a particular agent group unless it contains at least five available agents. You do this by editing the queue's matching rule. Every queue is configured with one or more matching rules by your storm administrator, and a matching rule points a queue to one or more agent groups.
Note: the queues and matching rules that you can work with are assigned to you by your administrator.
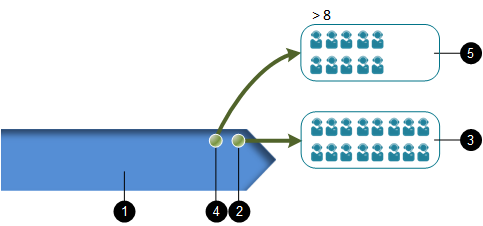
As an example, the illustration below shows a 'Summer Holidays' queue (1), which is configured with the two matching rules 'Main' (2) and 'Overflow' (4). The 'Overflow' rule is configured to route contacts to the 'General Holidays' (5) agent group when the 'Main' rule cannot route those contacts to the 'Summer Holidays' agent group (3). Additionally, the 'Overflow' rule is based on agent availability so that contacts will only be routed to the 'General Holidays' agent group when that group contains more than eight available agents.
Procedure
- In the Toolbar at the left of the DTA main application window, click the
 button to display the Settings Window.
 - In the Settings window, select User Management.
- Select Edit Matching Rules.
- Select the queue whose matching rule you want to edit.
- For the selected queue, select the matching rule that you want to edit.
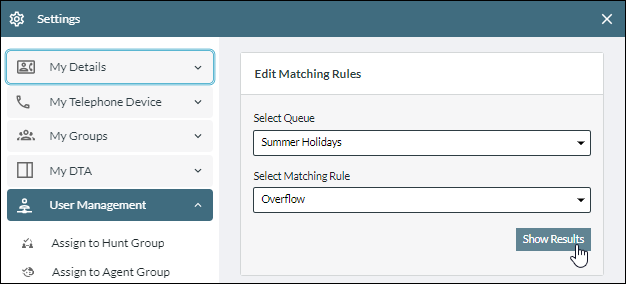
- Click the Show Results button to see the agent group(s) that the matching rule routes contacts to.
- Edit the value(s) in the Available Agents field(s) as required.
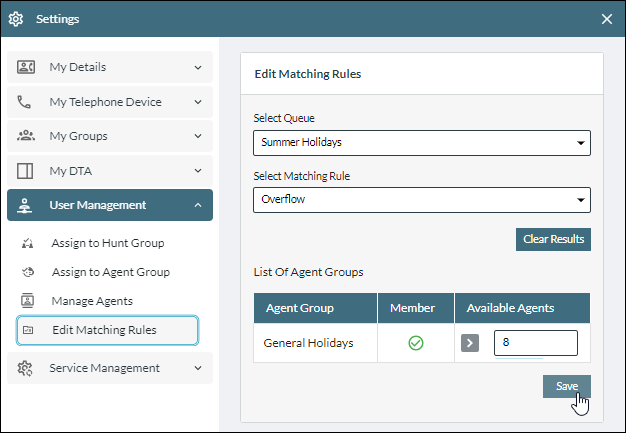
Note: the  icon in the 'Member' column indicates that the agent group is configured to receive traffic via the selected matching rule. The
 ![]() icon is the 'Greater Than' operator. You may also see the
icon is the 'Greater Than' operator. You may also see the ![]() (Less Than) and
(Less Than) and ![]() (Not Equal To) operators for some agent groups depending on how your administrator has configured your queue routing.
(Not Equal To) operators for some agent groups depending on how your administrator has configured your queue routing.
- Click Save.
- Close the Settings window by clicking its
 button, or by clicking anywhere outside the window within the main application window.