Create Custom Real-Time Events
This is a procedural topic for administrators describing how to create custom real-time events for selection in the Real-time Events Selector. The events can then be displayed in any of the following real-time modules.


Creating custom events allows you to integrate real-time statistical data from your third-party tools into VIEW so that data from different sources can be seen in one place. You do this by setting up your events in VIEW and then sending real-time data update requests to a REST API endpoint in the ViewWebService application.
This topic also covers the following related tasks:
Prerequisites
- You have logged in to storm with your user log in credentials and then launched the VIEW application. See Log in to storm and Launch VIEW.
- You are familiar with the VIEW Dashboard Interface.
- You have created a real-time dashboard. See Create a Dashboard for Real-Time Statistics.
Configuration
This is a two-stage procedure:
Create the Custom Events in VIEW
Call the ViewWebService Application to Update the Custom Events
Create the Custom Events in VIEW
- Click
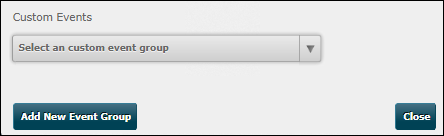
 in the top-right of the VIEW window and then select Custom Events.
 - In the Custom Events dialog, click Add New Event Group.
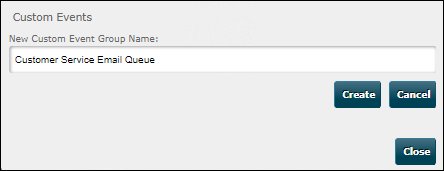
- Type a meaningful name for the group of events you want to create and then click Create.
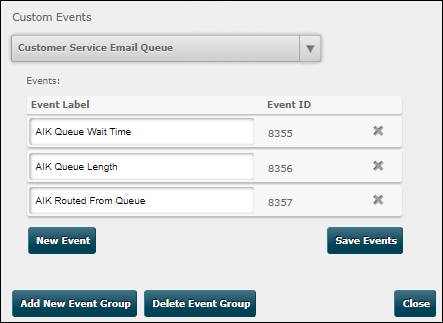
- Create a custom event by clicking New Event and then type the name of the event. It is recommended that you provide a unique name so that the custom event will not be confused with the standard VIEW real-time events.

- Create further events as necessary by repeating step 4.
- When you have created all of the custom events for the group, click Save Events. VIEW assigns a unique ID to each event in the group:
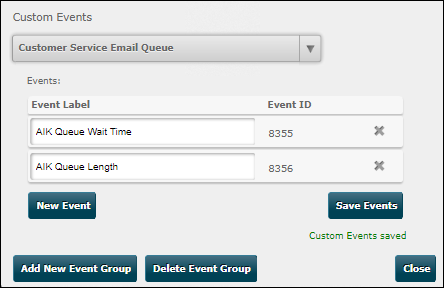
- Make a note of the event IDs and then click Close.
- Place the desired real-time module on your dashboard (see Place Real-Time Modules on a Dashboard).
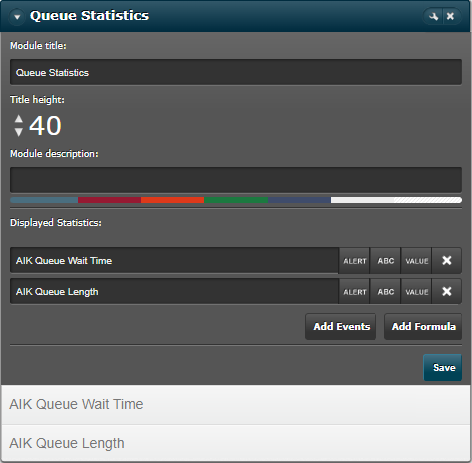
- Configure the module to include the new custom events along with any standard (non-custom) events (see Real-Time Statistics Configuration Tasks). Custom events are available in the 'Bespoke Options' section of the Real-Time Events Selector:
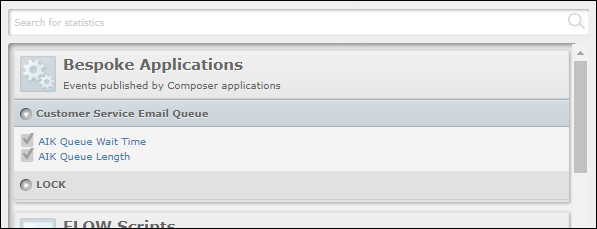
Note: it can take up to 30 minutes for new custom events to appear in the events selector window.
The illustration below shows two custom events that have been added to a real-time List Module.
Note: the supported measurement types for custom events are Update Count and Current Value only.
- Call the ViewWebService application to populate the custom events with values in real-time. See below.
Call the ViewWebService Application to Update the Custom Events
You will need to create (or modify) an application for updating your new custom real-time events.
|
Your application |
PublishEvents |
|
Custom events (as seen in VIEW real-time modules) |
|||||
|
Update requests |
||||||||
|
VIEWWebService |
||||||||
|
storm VIEW |
||||||||

Whenever you want to update a real-time module with particular values, your application must send an update request (containing those values) to the PublishEvents REST API endpoint in the ViewWebService application. Updates should typically be after every one second for real-time performance. The API uses the data in the request to update the custom events, responding to each update attempt with a success or failure. Failure is indicated by a result code and, where possible, a failure reason.
- In your application, set up event update values in a PUT request to the endpoint for your region:
|
Region |
Endpoint |
|
United Kingdom |
https://www.timeforstorm.com/stormstudio/ViewWebService https://www.stormesp.com/stormstudio/ViewWebService (Emergency Services Platform customers only) |
|
United States |
https://www.stormportal.us/stormstudio/ViewWebService |
|
Europe |
https://www.timeforstorm.eu/stormstudio/ViewWebService |
|
Japan |
https://www.connectstorm.jp/stormstudio/ViewWebService |
Use the following code structure for the request:
{
"EventUpdates": [
{
"EventID": ID from Custom Events dialog,
"Value": "Value",
}
]
}
Where, ID from Custom Events dialog is the ID of the event that you want to update (one of the values you noted in step 7 of Create the Custom Events in VIEW), and Value is the update value enclosed in quotes.
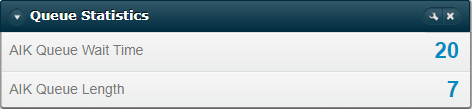
For example, the following PUT request will update the two events created earlier with the values '20', and '7'.
{
"EventUpdates": [
{
"EventID": 8355,
"Value": "20",
},
{
"EventID": 8356,
"Value": "7",
}
]
}
Note: you can include updates for up to 100 events in a single PUT request.
Note: your application must not update a particular event within one second of its previous update. If this happens, only the first update will apply; subsequent updates in the one-second period will be ignored.
- Ensure that your application provides appropriate handling for any occurrences of the failures listed in the following table:
|
Failure Reason |
Description |
|
Request does not contain event values |
The request did not contain any event values. |
|
Too many events |
There were more than 100 events in the request. |
|
None of the supplied events have been updated. Each event cannot be updated more than once per second |
One or more requests attempted to update an event more than once within one second. |
|
All supplied event ids are invalid |
The event IDs in the request do not exist. |
|
None of the supplied events have been updated |
This is a general catch all reason where none of the events in the request were updated because of failures associated with some or all of the events in the request. |
- Run your application. The custom events in the configured real-time module will update to reflect the transmitted values:
For more details about the ViewWebService application, see the storm Web Services Reference Guide.
Related Tasks
Modify a Custom Event Group
This section describes how to add events to or remove events from an event group.
- Click in the top-right of the VIEW window and then select Custom Events.
- In the Custom Events dialog, select the Event group to which you want to add an event or from which you want to remove an event.

- To add a new event to the group, click New Event and then type the name of the event. It is recommended that you provide a unique name so that the custom event will not be confused with the standard VIEW real-time events.

To delete an event, click its  button.
Note: a deleted custom event will remain in any modules in which it was included, and it can still be updated with new values. Deleting a custom event prevents administrators from including it in real-time modules from this point onwards.
- Click Save Events. Make a note of the Event ID for events you have added as these will be required by your application for updating these events.
- Click Close.
- Modify your application so that it updates any new events and stops updating any deleted events.
Delete a Custom Event Group
This deletes an entire set of custom events.
- Click in the top-right of the VIEW window and then select Custom Events.
- In the Custom Events dialog, select the event group you want to delete.
- Click Delete Event Group.
Click OK to confirm the deletion.
Note: deleted custom events will remain in any modules in which they were included, and they can still be updated with new values. Deleting an event group prevents administrators from including its events in real-time modules from this point onwards.
- Click Close.
- Modify your application so that it stops updating the deleted events.