Create a Custom Dimension
This is a procedural topic for administrators describing how to create a custom dimension for breaking up metric values in a report using your own dimensions rather than by the VIEW library of standard dimensions. The custom dimension can then be included in a custom historical report.
This topic also covers the following related tasks:
Prerequisites
- You have logged in to storm with your user log in credentials and then launched the VIEW application. See Log in to storm and Launch VIEW.
- You are familiar with the VIEW Dashboard Interface.
- You are familiar with custom historical reports. See Custom Historical Reports.
- You understand the effect of adding dimensions to custom reports. See Effect of Adding a Dimension to a Custom Historical Report.
- You are familiar with the Report Builder Interface for Custom Historical Reports as this is where you create custom dimensions.
Configuration
-
Click
 in the top-right of the VIEW window and then select Report Builder.
-
Select Custom Report from the Report Type selector.
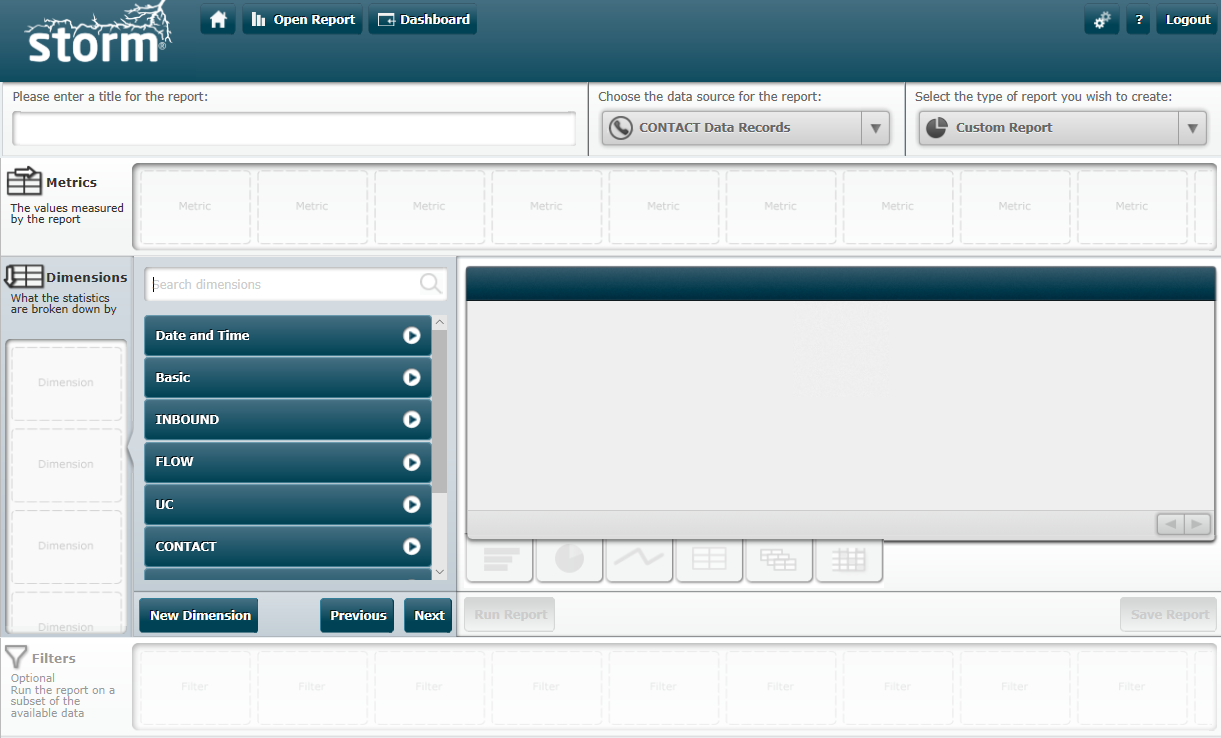
-
Select the desired historical data source from the Historical Data Source selector.
-
Ensure that the Dimensions ribbon is active (highlighted in grey as shown above). It if is not, click it. This displays the Dimension Selector panel to the right.
-
Click the New Dimension button.
-
In the dimension configuration dialog, enter a meaningful name for the dimension and then select the category in which the dimension should appear for selection (categories are displayed in the Report Builder's Dimension Selector panel.)
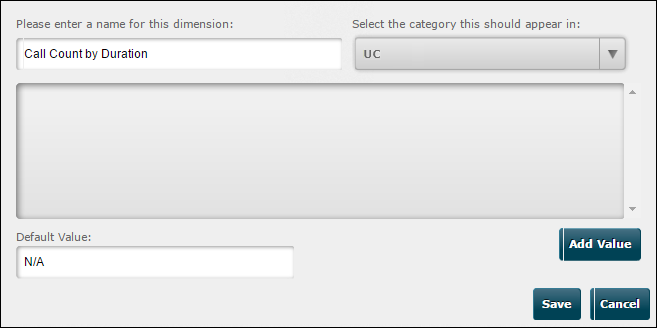
-
Click Add Value to add the first dimensional category.
-
Name this first dimensional category and then click Add Filter to configure it.
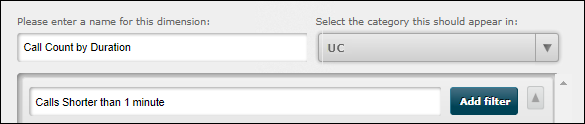
-
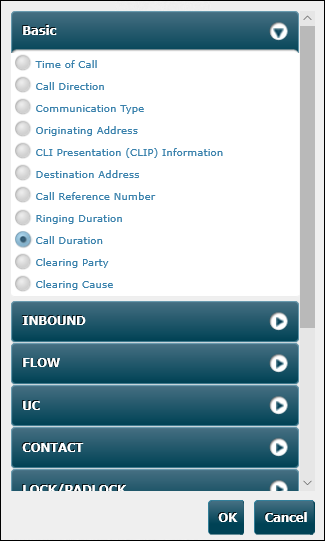
Select the appropriate filter for the category and then click OK.
-
Configure the filter value and then click OK.
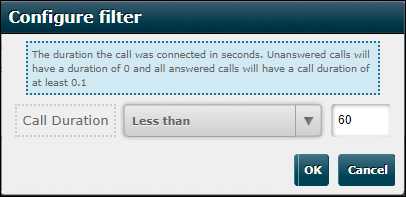
Note: the Historical Data Export Fields Reference in the storm VIEW Historical Data Source Reference Guide describes all of the data export fields to which VIEW filters relate.
-
If required, add further filters to this dimensional category.
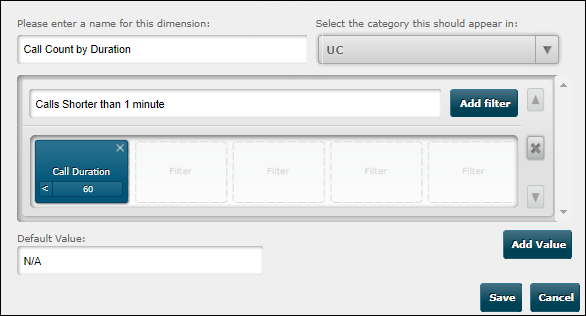
If no value falls into this dimensional category, 'N/A' will be displayed by default as shown in the Default Value field. Provide an alternative name if desired.
The first dimensional category is now configured:
-
Click Add Value to add a second dimensional category in a similar manner.
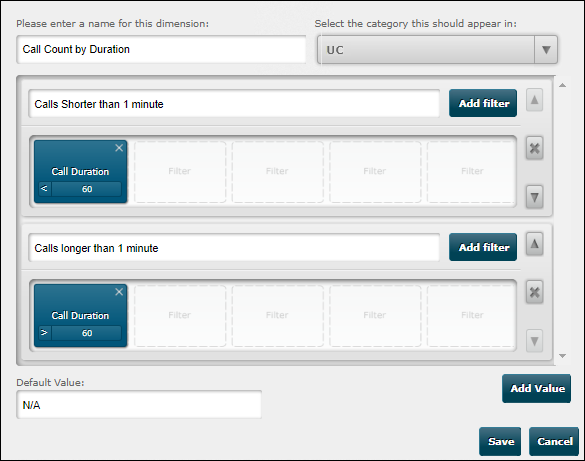
-
Click Save when all required dimensional categories have been added. You can add up to 20 categories.
The new dimension is now available in the Report Builder's Dimension Selector panel (in your selected category) from where it can be added to historical reports created in this data source.

Related Tasks
Edit a Custom Dimension
-
Click the custom dimension's
 button in the Dimension Selector panel. Make the required changes in the configuration dialog and then save your changes.
 -
If the dimension is present in other reports, open and then save those reports. (To open a report, you may follow the general procedure in Open a historical report for editing but do not edit the report.) This applies the changes to the dashboard display of those reports.
Delete a Custom Dimension
-
Click the dimension's
 button in the Report Builder's Dimension Selector panel and then click OK in the confirmation dialog. The dimension is permanently deleted from the panel.
 -
If the dimension is present in other reports, open and then save those reports. (To open a report, you may follow the general procedure in Open a Historical Report for Editing but do not edit the report.) This dimension is permanently removed from the dashboard display of those reports.