Configure a Real-Time Message Alert
This is a procedural topic for administrators describing how to configure a real-time message alert. See Message Alerts.
A real-time alert is raised when a certain trigger condition is met. For example, when a particular queue has more than 15 waiting contacts, or if there are no agents available in an agent group.
An active alert is displayed in an Alerts Module. You can also have it displayed in a pop-up window on the dashboard or send an email or SMS message to named recipients.
This topic also covers the related task Delete an Alert.
Prerequisites
- You have logged in to storm with your user log in credentials and then launched the VIEW application. See Log in to storm and Launch VIEW.
- You are familiar with the VIEW Dashboard Interface.
- You have created a real-time dashboard. See Create a Dashboard for Real-Time Statistics.
Basic Configuration
-
Click
 in the top-right of the VIEW window and then select Alerts.
 -
Click the New Alert button.
-
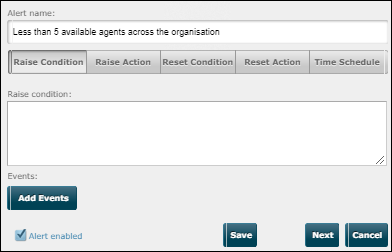
On the Raise Condition tab of the displayed dialog, provide a meaningful name for the alert and then click Add Events:
-
In the dialog displaying a categorised list of entities configured in your contact centre, select the event that will raise the alert trigger and then click OK at the bottom of the dialog.
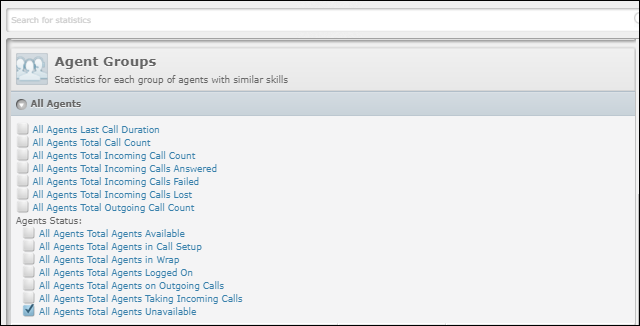
Note: at the bottom of each category of events, click the Show More link to show more entities as necessary. To quickly search for an entity or an event, type its name in the filter field at the top of the dialog.
For a complete list and descriptions of all events available in this dialog, see Real-Time Events Selector.
-
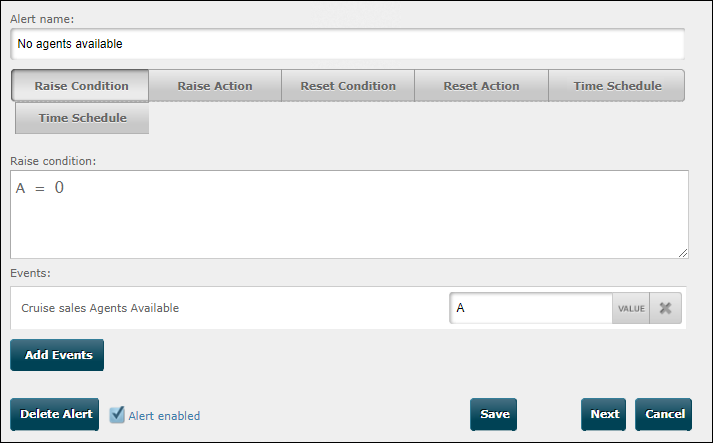
If desired, edit the default operator and value. The alert below is designed to raise an alert when there are less than 5 available agents across the entire organisation:
For supported operators, see Appendix A: Supported Operators For Real-Time Statistics.
-
Click the dialog's Raise Action tab and choose the action to perform when the alert is raised and provide the action details on the right-hand side of the panel.

For the Send Email option, there is an 11-character limit on the length of the ‘from’ address field in the UK. If you are outside the UK, please check with your storm support representative what limit is applied where you are based.
For the Pop-up option, pop-up windows appear on the real-time dashboard when the alert is raised.
For the Raise user notification in DTA option, the alert message is displayed to agents in storm DTA (agent desktop) who belong to the agent groups that you select in the dialog.
-
Click Save.
The alert is listed and is active. As well as raising the configured action, the alert will be listed in the Alerts module.
Note: it is possible to trigger an automated service to run in FLOW when an alert condition is met; this must be configured by a system engineer. Please contact your support representative for further information.
Related Topics
Delete an Alert
-
Click
in the top-right of the VIEW window and then select Alerts. -
In the list of alerts, select the alert you want to delete.
-
In the alert configuration dialog that is displayed, click the Delete Alert button.
Explore Further
Reset an Alert (Optional)
Use the alert configuration dialog's Reset Condition and Reset Action tabs to send an email or an SMS message to named recipients when the
- alert raise condition is no longer true
- after a set period of hours, minutes, or seconds (even if the raise condition is true). Further alerts will be raised as long as the raise condition is met.
- when another condition is met (you can define this using another event or formula of events)
On reset, the alert is removed from the Alerts module.
Control When an Alert is Raised (Optional)
An alert is active at all times unless you restrict it using the configuration dialog's Time Schedule tab. This controls when the alert is raised:
.
Use the Add Schedule button to add a time band and then select the days and time range for that band.
In the above example, the alert will be active on all weekday office hours and for a shorter period on Saturday. It will not be active on Sunday.
Note: when a schedule is set, the alert's status will show as 'inactive' (in the list of alerts) during any time period that is outside a configured schedule timeband.