Export Historical Reports According to a Schedule
This is a procedural topic for administrators describing how to export selected historical reports according to a schedule. You can send the reports to email and FTP destinations, and also to an external system (currently Salesforce).
Note: a scheduled report is exported only if it contains data.
Note: three consecutive export failures across any reports in a schedule causes VIEW to disable that schedule. Contact your local support desk if this occurs.
This topic also covers the related task Edit or Delete an Export Schedule.
Prerequisites
- You have logged in to storm with your user log in credentials and then launched the VIEW application. See Log in to storm and Launch VIEW.
- You are familiar with the VIEW Dashboard Interface.
- You are familiar with historical reports. See Historical Data Export Reports and Custom Historical Reports.
- If you are setting up an FTP or sFTP export to a new location, acquire the following details: server address; username; password; and public and private keys (keys in RSA 2048 format are acceptable).
Configuration
-
Click
 in the top-right of the VIEW window and then select Scheduled Reports.
-
Click the Add Schedule button:
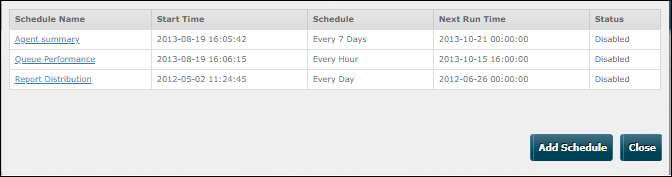
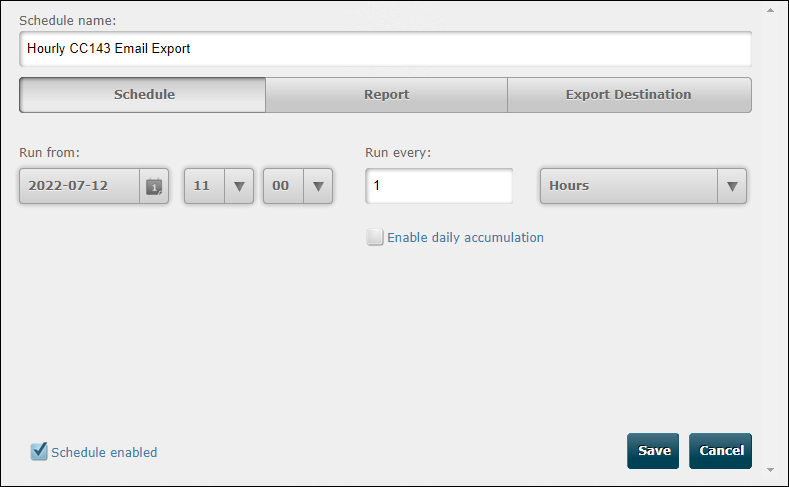
The following export frequencies are available:
|
Export Frequency |
Description |
|
n Minutes |
Export every n minutes from the defined start time, when each export contains n minutes of data. You must specify a value of 5 or more. Note: by selecting the tab's Enable daily accumulation option, each n minute export will contain data from midnight instead of n minutes of data. |
|
n Hours |
Export every n hours from the defined start time, when each export contains n hours of data. Note: by selecting the tab's Enable daily accumulation option, each n hour export will contain data from midnight instead of n hours of data. |
|
n Days |
Export at 02:00 every n days from the defined start time, when each export contains n days of data. |
|
n Weeks |
Export at 02:00 every n weeks from the defined start time, when each export contains n weeks of data. |
|
n Months |
Export at 02:00 every n months from the defined start time, when each export contains n months of data. |
Note: for a selected period of minutes or hours, data will be exported over the specified period when all of the data for the time range has been imported into VIEW (the import can take between 5 and 10 minutes after being generated).
The table below describes the effect of some typical settings:
Run from 09:30 on a selected day. Run every 15 minutes
|
Data will be exported at |
Containing data collected between these times on that day |
|
09:30 |
09:15 and 09:30 |
|
09:45 |
09:30 and 09:45 |
|
and so on |
Run from 09:30 on a selected day. Run every 15 minutes with 'Enable daily accumulation' enabled
|
Data will be exported at |
Containing data collected between these times on that day |
|
09:30 |
00:00 and 09:30 |
|
09:45 |
00:00 and 09:45 |
|
and so on |
Run from 09:30 on a selected day. Run every 1 hour
|
Data will be exported at |
Containing data collected between these times on that day |
|
09:30 |
08:30 and 09:30 |
|
10:30 |
09:30 and 10:30 |
|
And so on |
Run from 09:30 on a selected day. Run every 1 hour with 'Enable daily accumulation' enabled
|
Data will be exported at |
Containing data collected between these times on that day |
|
09:30 |
00:00 and 09:30 |
|
10:30 |
00:00 and 10:30 |
|
And so on |
Run from 2021-12-16. Run every 1 day
|
Data will be exported at |
Contains data collected between these times on the previous day |
|
2021-12-16, 02:00 |
00:00:00 and 23:59:59 on 2021-12-15 |
|
2021-12-17, 02:00 |
00:00:00 and 23:59:59 on 2021-12-16 |
|
And so on |
Run from 2021-12-16. Run every 1 week
|
Data will be exported at |
Contains data collected between these times in the previous week |
|
2021-12-16, 02:00 |
00:00:00 on 2021-12-08 and 23:59:59 on 2021-12-15 |
|
2021-12-23, 02:00 |
00:00:00 on 2021-12-16 and 23:59:59 on 2021-12-22 |
|
And so on |
Run from 2021-12-16. Run every 1 month
|
Data will be exported at |
Contains data collected between these times in the previous month |
|
2021-12-16, 02:00 |
00:00:00 on 2021-11-15 and 23:59:59 on 2021-12-15 |
|
2022-01-16, 02:00 |
00:00:00 on 2021-12-16 and 23:59:59 on 2022-01-15 |
|
And so on |
-
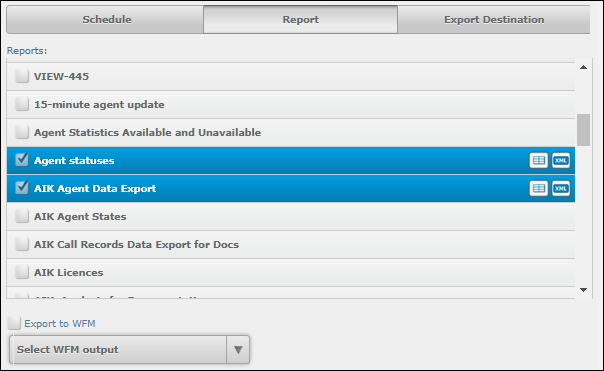
On the Report tab, select the report(s) to export. Click one or more of the display options on the right. These are set and stored with each report. For details, see the section Configure Display Options (For Use in Scheduled Exports).
-
If your system has custom report templates configured, select Export to Template to export to one of those templates. A template is a formatted Excel file.
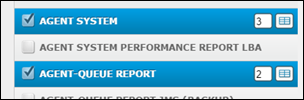
For each selected report, enter sequential numbers in the fields adjacent to each selected report. These determine the order in which reports will appear in the export file.
-
If you use the QPC IEX workforce management system, or Verint, select Export to WFM to export the reports to a format supported by the target system:
|
Description |
|
|
IEX Totalview |
This exports all selected reports in a single ASCII file of comma-separated values suitable for the QPC IEX workforce management system. Note: IEX does not accept fractional values. Values that may contain decimal points must be set to display as ‘Integer’ or ‘Seconds (Int)’. For each selected report, enter sequential numbers in the fields adjacent to each selected report. These determine the order in which reports will appear in the export file. |
|
Verint WFO |
The data is exported in a format that can be imported into Verint. |
-
On the Export Destination tab, select one of the following available export methods and complete the fields that appear:
|
Option |
Description |
|
Enter one or more email destinations. The From Address field must contain a string of characters comprising an email prefix, the @ character, and the email domain. Note: the data size of historical report data in a scheduled export to email destinations is limited to 100 MB. If you receive an email informing you that your reports could not be emailed on account of exceeding this limit, consider editing the reports in the schedule so that less data is generated. |
|
|
If you are using an FTP or SFTP destination, the exports can be pushed to or pulled by the destination. You must consult your CG support desk so that they can configure your reports for export. Send the following details: destination address; username; password; and public and private keys (keys in RSA 2048 format are acceptable). |
|
|
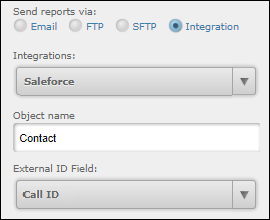
Integration |
This is for exporting to an external system (currently Salesforce only). Contact your account manager for further information about integrating your system to receive data. Select a preconfigured integration. In the Object Name field, specify the object into which the report’s data is to be sent. From External ID Field, select a field from the report that you want Salesforce to use for updating and inserting records. Note: there is a limitation of one report per schedule. |
-
Click Save.
Related Task
Edit or Delete an Export Schedule
-
Click
in the top-right of the VIEW window and then select Scheduled Reports. -
Click the schedule to open the schedule configuration dialog.
-
To edit the schedule, make the desired changes and then click Save. To delete it, click the Delete Schedule button.
See Also
Appendix B: Best Practice Guidelines for Historical Report Performance