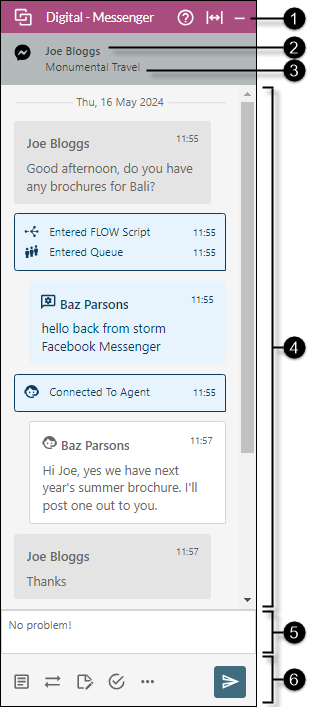
Digital Panel
This is displayed automatically when you receive a web chat or social media message.
You can operate this panel by using your mouse or keyboard (see Accessibility Features).
|
|
|
|
|
||||||||||||||
|
|
|
Panel help and control buttons |
|
||||||||||||||
|
|
|
Sender |
For a social media message, this is the sender's social media account username. For a web chat, this is the name entered by the guest. |
||||||||||||||
|
|
|
Destination |
For a social media message, this is the username of the destination social media account. For a web chat, this is the name of the web chat service as configured by your storm administrator. |
||||||||||||||
|
|
|
Messages |
Displays the messages in the active session. The messages are colour-coded.
|
||||||||||||||
|
|
|
Message Editor |
Use this field to type the message you want to send to the user(s) in the active session. You can paste text into this field by pressing Ctrl + V on your keyboard. |
||||||||||||||
|
|
|
Message action buttons |
Use one of these buttons to perform an action.
|


 Digital button in the


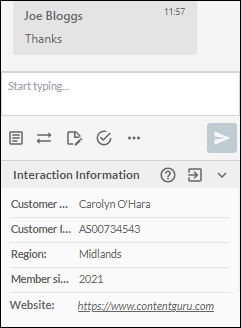
Interaction Information Panel
Some incoming digital interactions may display information relating to the interaction such as the customer's details based on information gathered from a database.
This information appears in an information panel, which may be embedded in the Comms panel (as shown below) or displayed as a separate panel alongside the parent panel.