The Workspace
The workspace is the area in which you carry out the tasks required to build your contact centre, such as creating and configuring parameters, services, queues, and IVR menus.
Workspace tools and features include drop-down lists, text search fields, a global filter, buttons, a row display tool, and date and time tools.
Drop-Down (Selection) Lists
Basic Lists
Basic drop-down lists support a shortcut which is useful where you have a long list of options to select from.
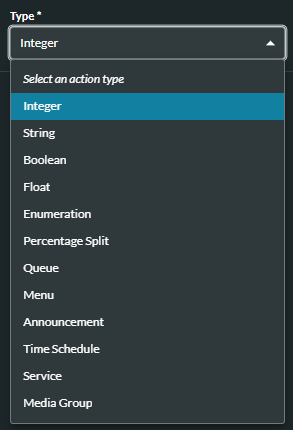
- Click the Down Arrow
 on the drop-down list.
 - Using the keyboard, type the initial letter of the option you want to select.
The cursor moves to the first option in the list which starts with the letter you typed - 'm' in the example above. You can re-type the letter if you need to continue searching.
- Click on an option to select it.
Multi-Selection Lists
Basic multi-selection lists allow you to select more than one option.
- Click the Down Arrow on the drop-down list.
- Click on an option to select it. To clear a selection, click on the option again. To close the list, click the search field.
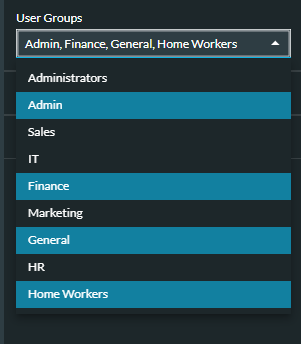
Other multi-selection lists, such as the User Group list in the global filter, have additional features.
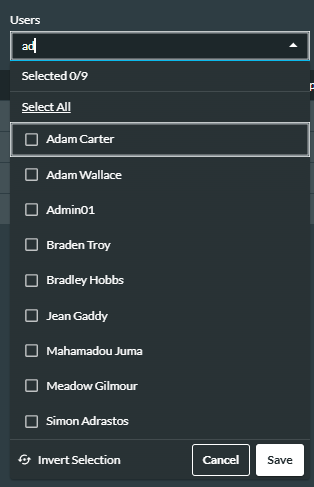
With the Select All button you can select all the options at once. The Invert Selection button allows you to reverse your selection, to select only the options which you do not currently have selected.
- Click the Down Arrow on the drop-down list.
- To select an option, click its check box. To clear an option, clear its check box.
- Click outside the window to close the drop-down list, then click the Apply Filter button which is now enabled.
- To clear individual filters, click the filter's Close
 button, or to clear all filters, click the Close All
  button.
Tip: to clear all filters when the list is expanded, click Select All followed by Invert Selection and Save.
Note: advanced multi-selection lists also support Boolean and Fuzzy Logic text searching.
Text Search Fields
A number of the pages in the workspace include text search fields.
Searches are limited to element (for example, queue or parameter) names. Usernames where present, are included in the search. The search is carried out on the characters you enter, and is case insensitive. The field accepts any alphanumeric characters, including spaces.

Inverse Searches
An inverse search allows you to search for names which do not include the characters you enter in the search field.
Note: the inverse search feature is only available on pages which contain the Invert Search switch.
Example: typing '2' in the search field will display all names that do not contain the digit '2'.
To perform an inverse search:
- Optionally, filter the search using either the fuzzy logic or Boolean search described below.
- Click the Invert Search switch to the On position.
- You can type new characters in the text search field to perform another inverse search, or click the Invert Search switch to the Off position, to revert to a standard search.
Fuzzy Logic Search
For a fuzzy logic search, the characters you type must be adjacent to each other in the element name (and in the search field); this includes spaces.
Example: to search for 'Health Insurance Claims', typing any of 'h', 'he', or 'e c', for example, will find it; typing 'ha' or 'h a' will not.
No results will be returned if the characters you enter in the search field are either not found in any element names, or are not found in any element names in the order in which you typed them.
Boolean Search
For a Boolean search, you can use the 'wild card' * to search for element names.
Example: to search for names starting with 'c' you should type 'c*'. An inverse search of this excludes all names starting with 'c'. To search for names ending with 'c', you should type '*c'. To search for names containing 'c' and '2', you should type '*c*2*'.
Global Filter
The filter button at the top right hand corner of the workspace is used to apply filters globally.

It is currently restricted to user groups. User groups are associated with announcements, time schedules, and the skill matrix. The filter can also be used to filter users in the audit log. If you have selected one or more user groups in the filter, those announcements/time schedules assigned to at least one of the groups will be displayed when you access the page, otherwise none will be displayed. Similarly, only those users who are members of those filtered user groups will be displayed on the skill matrix page and the audit log. An example of how the filter works can be found in the Appendix.
On applying a filter, all relevant pages are updated at the same time.
Create a Global Filter
- Click the Filter button, and in the window that is displayed, click on the drop-down list and select the user groups. The search methods described above are also supported.
- Click outside the window to close it when done, then click the Apply Filter button.
Only those announcements which are assigned to the user groups you select will be displayed in the Media Announcements panel. The principle is the same for time schedules, agents in the skill matrix, and users in the audit log.
Note: the skill matrix and audit log each have a dedicated user filter. When you set a global filter, any user filters you have applied in the dedicated filters are replaced with users matching the global filter settings, and you will not be able to select any others. You should consider whether you need to update or clear the global filter. Refer to Managing Agent Group Assignments and Audit Log.
- Click the Apply Filter button at the bottom of the window.
On applying filters, a counter showing the number of filters applied appears on the Filter button.

Clear the Global Filter
- Click the Filter button.
- In the User Group field, click the Clear
 button next to the filter you want to clear. Alternatively, to clear all filters, click Select All followed by Invert Selection and Save.
 - Click the Apply Filter button at the bottom of the window.
Buttons
Sort Buttons
There are two types of sort button, Descend ![]() and Ascend
and Ascend ![]() . They can be found on Name columns.
. They can be found on Name columns.

By default, names are displayed in alphanumerical order, followed by numerical order.
Click the Descend ![]() button to reverse the displayed order. Click the Ascend
button to reverse the displayed order. Click the Ascend ![]() button to reset the list to the original order.
button to reset the list to the original order.
Edit Buttons
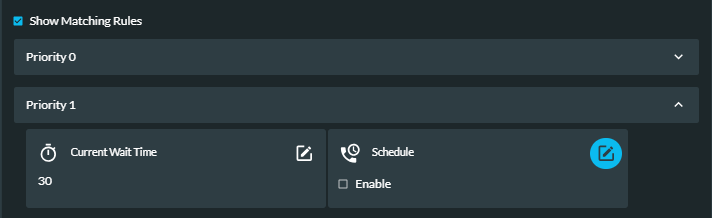
Edit ![]() buttons, such as those used for editing matching rule schedules, may on clicking, change to blue
buttons, such as those used for editing matching rule schedules, may on clicking, change to blue ![]() , to indicate that an element is actively being edited.
, to indicate that an element is actively being edited.
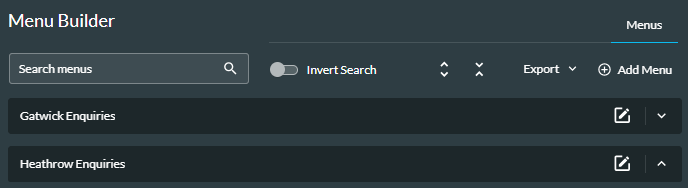
Expand All and Collapse All Buttons
The Expand All ![]() and Collapse All
and Collapse All ![]() buttons allow you to expand or collapse elements such as IVR menus, queues, and time schedules.
buttons allow you to expand or collapse elements such as IVR menus, queues, and time schedules.
Tip: for best results, use the buttons together with the search function.
Enabling and Disabling Features
You can enable or disable the following queue features in real time:
A feature that is disabled has the label 'Disabled'.
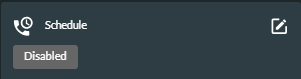
A feature that is enabled shows the current value of the associated parameter.
To enable a feature:
- Click the Edit
 button.
 - Select the Enable check box.
- If required, select or modify the parameter/value.
- Click the Edit
 button.
To disable a feature:
- Click the Edit button.
- Clear the Enable check box.
- Click the Edit button.
Row Display Tool
The row display tool is found at the bottom of some pages, such as the Matching Rule Schedules page. It allows you to select the number of rows to display per page. The minimum is 5 and the maximum 100. The total number of rows is also shown.
![]()
By default, ten rows per page are displayed. To change the number of rows displayed, click the Rows per page drop-down list and select a new value. You can navigate through the pages using the left and right arrows.
Date and Time Tools
Date and time tools provide a convenient way to select dates and times. They present as either a combined date and time tool, or as separate tools, depending on the feature they are used in.
Date-Only Tools
The date-only tool allows you to select a single date or a range of dates (where applicable).
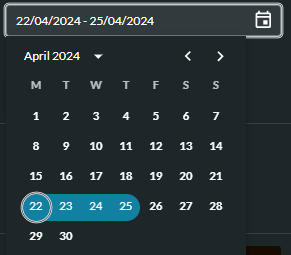
The current date is highlighted by a white circle. Selected dates are highlighted in blue.
To select a date or range of dates, click the Calendar  button.
- To select a single day, click on the date and click the Calendar button again.
- To select a range of dates, click on the start date followed by the end date.
Time-Only Tools
To use the time-only tool, select the start time using the 24-hour clock and click the OK button. Select the end time in the same way.
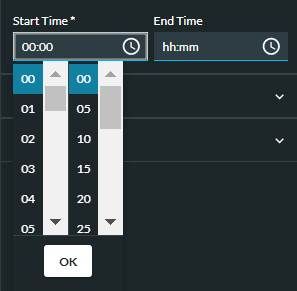
Alternatively, type the dates and times in the fields.
Combined Tools
The combined date and time tool allows you to select a single From date and a single To date.
Select the dates and times in the same way as the separate tools and click the OK button. Alternatively, type the dates and times in the fields.
Time Zones
Time zones allow you to use the standard time observed in your location, for CONDUCTOR matching rule schedules and time schedules. Time zones are expressed as positive or negative offsets from coordinated universal time (UTC). Refer to ISO 8601 - Date and time format.
Note: for countries observing daylight saving time (DST), it is not necessary to change the time zone to compensate for the changes to the time. For example, selecting ‘(UTC+00:00) Dublin, Edinburgh, London’ covers GMT and also BST in that time zone. The time adjusts automatically, but the screen label does not update to UTC+01:00.