Build a Time Schedule
You should add time layers to a schedule in the order in which you wish them to be checked (typically public holidays first and your normal business hours last for example, so that calls are not routed according to business hours on public holidays).
- Navigate to Scheduling > Schedules.
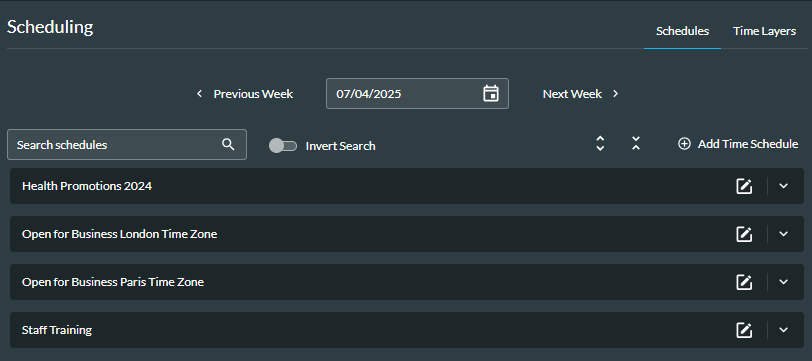
Any time schedules that you have previously created will appear in the panel that is displayed, and you can filter the list by entering criteria in the search field.
Note: the global filter setting affects this page. If the global filter has user group filters in place, this page is filtered according to the schedules assigned to those user groups, and to show all schedules, for example, you may need to update or clear the filter.
- Click the
 Add Time Schedule button.
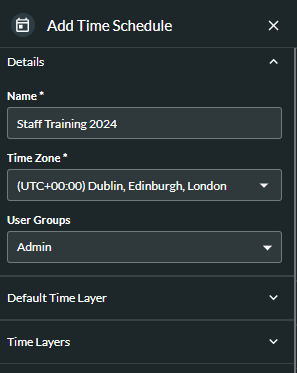
- Enter a meaningful name for the time schedule.
- Select the time zone applicable to your location. Alternatively, type the name of your location, for example 'London', to automatically populate the field.
- Optionally, to assign the time schedule to one or more user groups, select the groups from the drop-down list. If the global filter is set for one or more user groups, you will only be able to select those user groups, and you should consider whether you need to reset the filter.
Note: by assigning the time schedule to a user group, you can easily retrieve it using the global filter. See Example of Using the Global Filter to Filter on User Groups.
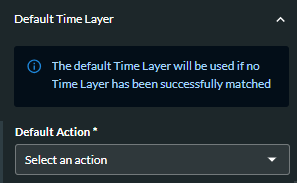
- Click the Down Arrow
 beside Default Time Layer to set the time layer that is used if, at runtime, none of the time layers in the time schedule match successfully.
|
Field or Option |
Description |
|
Action |
Select the action associated with the time layer. |
|
Value |
Enter or select, as appropriate, the value of the action. |
To add a time layer to the schedule:
- Click the Down Arrow beside Time Layers.
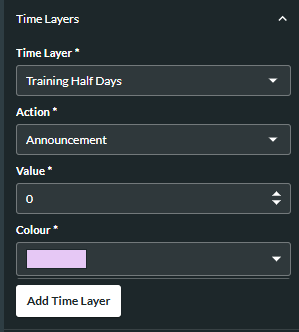
- Select the time layer.
- Select the action.
- Select the action's value.
Note: if you have selected one or more user groups in step 5, and you have selected an action which is configured with either an Announcement or Time Schedule type, some values may not be available for selection here. If the announcement or time schedule the action is configured with is assigned to user groups other than those you have selected here ('Administrators' in this example), those announcements/time schedules are not available for selection. For example, in the example above, if the 'Welcome' announcement had been assigned to the Sales user group, it would not have been available for selection.
- The option to change the colour of a time layer is available by selecting the new colour from the drop-down list.
- Click the Add Time Layer button.
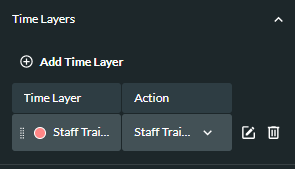
- The window that is displayed shows the time layer. To include additional time layers, click the Add Time Layer button.
- To edit the time layer, click the Edit
 button. To delete the time layer, click the Delete
  button.
 - To reorder a time layer in order to change its relative priority, click the Pick up
 icon and drag and drop the layer using the mouse (highest priority layer first, and so on).
 - To save the time schedule, click the Add Time Schedule button at the bottom of the window.
Note: it is not possible to add a time layer more than once. If you want to add two or more similar actions which have the same time period but which occur at different times of the day, you should create two separate time layers, each with the same value.