OUTBOUND Dial Panels
Dialler agents only
You can operate these panels by using your mouse or keyboard (see Accessibility).
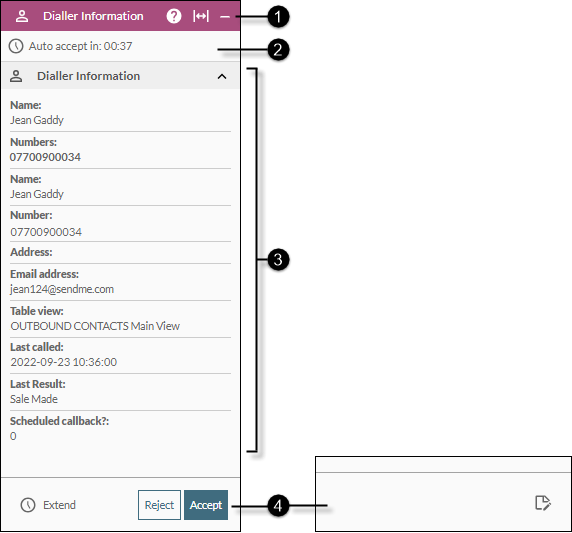
Dialler Information Panel
This is displayed automatically during an outbound call in the current storm OUTBOUND campaign, and persists while the agent is in the Wrap-up status.
|
|
|
|
|
||||||||
|
|
|
Panel help and control buttons |
|
||||||||
|
|
|
Auto Accept or Auto Reject timer |
(Preview campaign only) The time that will elapse before the contact is accepted or rejected automatically for the OUTBOUND call (as configured by your administrator). |
||||||||
|
|
|
Contact details |
Displays information about the contact who has been routed to you. If multiple numbers are displayed for the contact, the number that is being dialled is displayed in bold. |
||||||||
|
|
|
Use one of these buttons in a Preview dial campaign:
The following button is displayed during an OUTBOUND call across all campaign types:
|


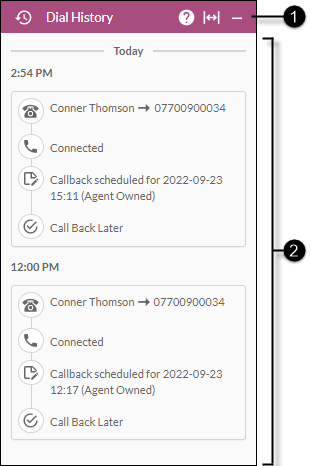
Dial History Panel
This displays a dial history for the contact you are speaking to if they have previously been handled by an agent in the OUTBOUND campaign.
|
|
|
|
|
||||||||||
|
|
|
Panel help and control buttons |
|
||||||||||
|
|
|
Dial History |
Shows the date and time of each outbound call in reverse chronological order (newest first). The symbols displayed against each outbound call have the following meanings:
|
 Dial History button in the


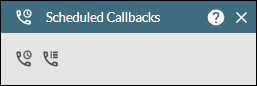
Scheduled Callbacks Panel
This is accessed by clicking the  button on the Toolbar. It allows you to see your scheduled callbacks in the OUTBOUND campaign, and to make retrospective changes to completion codes for historical OUTBOUND dial calls.
|
|
Clicking this displays this Help page. |
|
|
Closes the panel. |
|
|
|
|
|


Scheduled Callbacks Tab

_EN.png) |
This tab allows you to see all of your scheduled callbacks in the OUTBOUND campaign. Scheduled callbacks are highlighted in light blue. Future callback dates are selectable. Selecting a date displays the callback times for that day in the list below. You cannot select callback dates that have passed. |
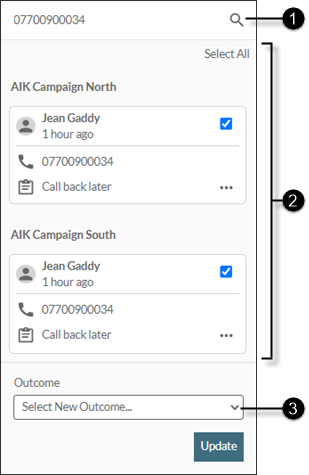
Search Dial Records Tab

This tab allows you to make a retrospective change to a completion code for a historical OUTBOUND dial call. This is typically used for changing a callback completion code to a non-callback one for a particular contact, or vice versa.
|
|
|
|
|
|
|
|
Search field |
Searches the current OUTBOUND campaign for contacts matching the entered telephone number. |
|
|
|
Search results |
Displays the matching contacts. Select a check box for a contact whose completion code you want to change. Or, click Select All to select all listed contacts. The |
|
|
|
Outcome |
Use this to assign another completion code to the selected contacts. Selecting a callback completion code displays additional callback date and time fields. |
 button displays the contact's details.
See Also
Handle a Preview OUTBOUND Call
Add a Note to an OUTBOUND Call