View or Edit a Time Layer
Note: to change the colour or action associated with a time layer, refer to Edit a Time Schedule.
- Navigate to Scheduling > Time Layers.
Time layers are listed on the page in alphanumeric order.
- Optionally, use the filters to search for a time layer.
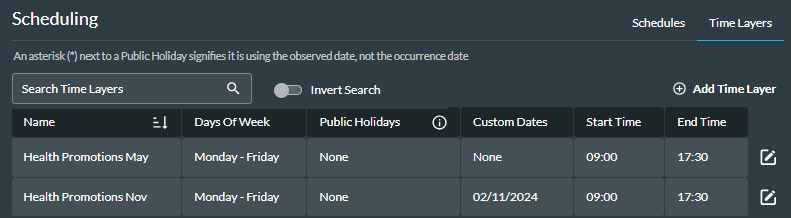
The fields are described in the table below.
|
Field or Option |
Description |
|
Name |
The name of the time layer. |
|
Days of Week |
Any days of the week configured for the time layer. |
|
Public Holidays |
Any public holidays configured for the time layer. A '*' next to a holiday indicates that the observed date is being used. |
|
Custom Dates |
Any custom dates configured for the time layer. |
|
Start Time |
The time the layer becomes active. |
|
End Time |
The time the layer becomes inactive. A blank field indicates the end of the day, which is the time up to but not including 00:00. |
- Click the Edit
 button next to the time layer you want to edit.
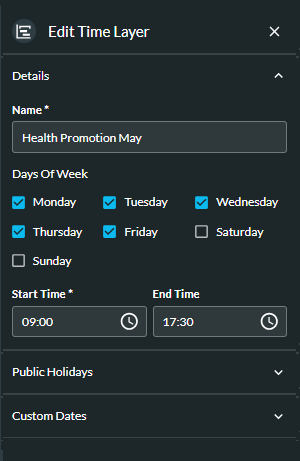
- The window that is displayed is the same as that described in Create Time Layers and you can make changes to any of the fields.
- Click the Save Time Layer button.