View or Edit a Queue and Matching Rules
You can edit a queue and view and update its matching rule properties. You can enable or disable queue properties in real time, to meet changes in demand volume.
Queue wait times are based on matching rules which determine when to route calls to agent groups. The matching rules take into account the user (agent) state and the value of the field Current Wait Time.
User states can be marked as:
- Active, where the agent is not currently available to take a call, but expects to be available shortly, and so is still considered as actively servicing queues
- Inactive, where the agent is not available and should be considered as currently unavailable to service queues
An example of how the matching rules are executed is provided in the table below.
|
Matching Rule |
Active agents in the group? |
Outcome of the Matching Rule |
Caller Total Wait Time (Seconds) |
|
Priority 1 (Agent group 1) Current Wait Time: 0s |
Yes |
Available agents start to take calls as soon as callers enter the queue. |
0 |
|
No |
Matching rule P1 (below) comes into effect immediately. |
0 |
|
|
Priority 2 (P1) (Agent group 2) Current Wait Time: 30s |
Yes |
Agents start to take calls immediately if there are no active agents in agent group 1. |
0 |
|
Agents start to take calls after 30s if there are active agents in agent group 1, but they are unavailable. |
30 |
||
|
No |
Matching rule P2 comes into effect immediately. |
0 |
|
|
Priority 3 (P2) (Agent group 3) Current Wait Time: 30s |
Yes |
Agents start to take calls immediately if there are no active agents in agent groups 1 and 2. |
0 |
|
Agents start to take calls after an additional 30s if there are active agents in agent group 1 or 2, but they are unavailable. |
60 |
||
|
No |
Matching rule priority 3 comes into effect immediately. |
0 |
To view queue properties:
- Navigate to Queue Management > Queues.
- Any queues that you have access to are shown in the panel that is displayed and you can filter the list.
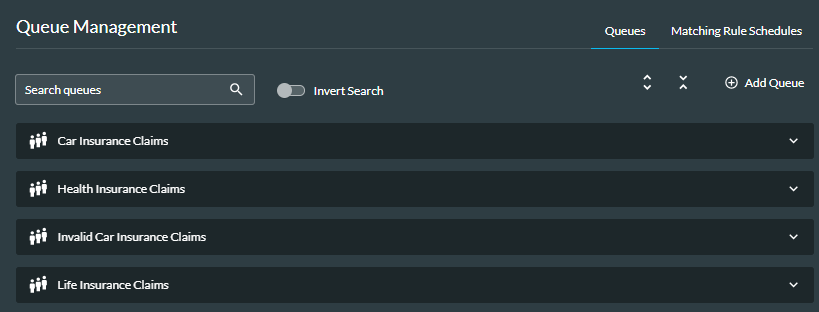
- Click on a queue to select it.
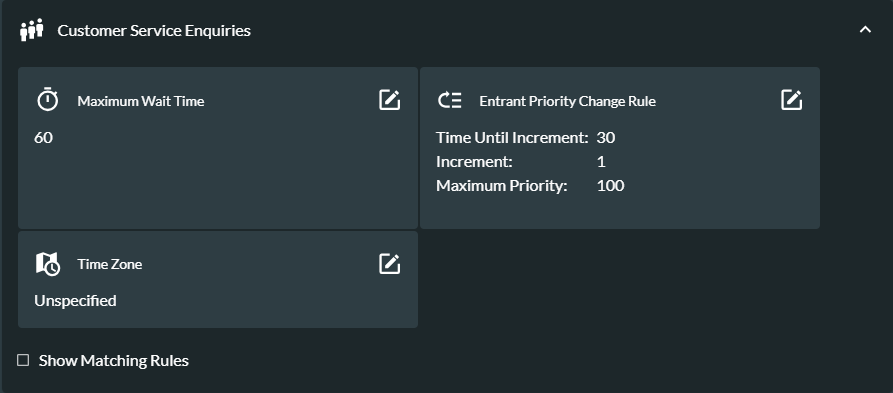
To edit the Maximum Wait Time:
- Click the Edit
 button.
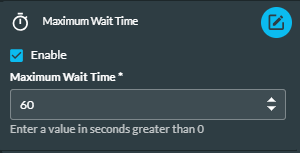
- If the wait time is disabled, select the Enable check box.
- Enter a new value in the field. (To disable the field, clear the Enable check box).
- To save your changes, click the Edit
 button.
Changing the Entrant Priority Change Rule allows you to increase the caller priority at intervals, or transfer calls to a different queue as high priority.
To edit the Entrant Priority Change Rule:
- Click the Edit button.
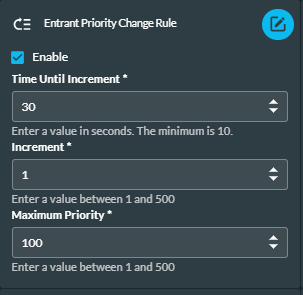
- If the rule is disabled, select the Enable check box.
- Enter the new values in the fields. (To disable the rule, clear the Enable check box).
- To save your changes, click the Edit button.
To edit the Completion Code Form:
- Click the Edit button.
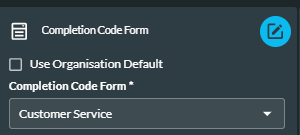
- To use your organisation's default form, ensure the Use OrganisationDefault checkbox is selected. Otherwise, with the Use Organisation Default check box cleared, select the new form from the drop-down list that appears.
- To save your changes, click the Edit button.
To edit the Time Zone:
- Click the Edit button.
- Select the time zone from the drop-down list. The time zone will be applied to all the matching rule schedules in the queue.
- To save your changes, click the Edit button.
To edit the Language:
- Click the Edit button.
- To use the language configured for your site, ensure the Inherit From Site check box is enabled. Otherwise, with the Inherit From Site check box disabled, select the new language from the drop-down list that appears.
To edit the Channel Type, or Site:
- Click the associated Edit button.
- Select the new value from the drop-down list.
- To save your changes, click the Edit button.
To view the matching rules:

- Select the Show Matching Rules check box and click on a rule to select it.
- The rules specify the queue current wait times and show any matching rule schedules configured for the queue.
Note: you cannot enable a matching rule schedule until you have assigned it to a matching rule (see below).
To assign a schedule to a matching rule:
- Click the Edit button beside the label 'Schedule'.
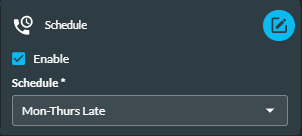
- If the schedule is disabled, select the Enable check box.
- Select the schedule from the drop-down list. (To disable the schedule, clear the Enable check box).
- To save your changes, click the Edit button.
To edit the Current Wait Time:
- Click the Edit button and enter the new value in the field.

- To save your changes, click the Edit button.