Agents
Administrators only.
The Agents page allows Administrators to manage agent groups.
They can:
- View storm UC agent groups
- View supervisors
View UC Agent Groups
- Navigate to Agents > Agent Groups.
Any existing storm UC agent groups are displayed and you can use the search field to filter the list.
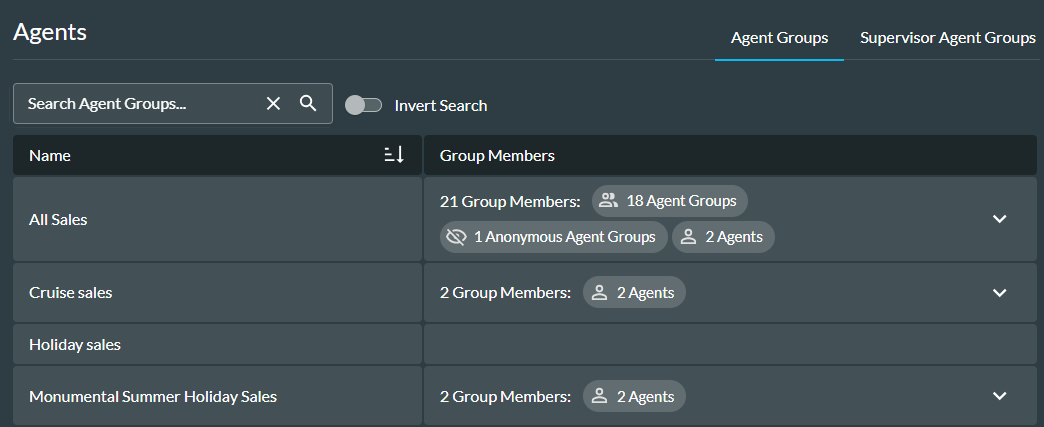
The fields are described in the table below.
|
Field or Option |
Description |
|
Name |
The name of the agent group. |
|
Group Members |
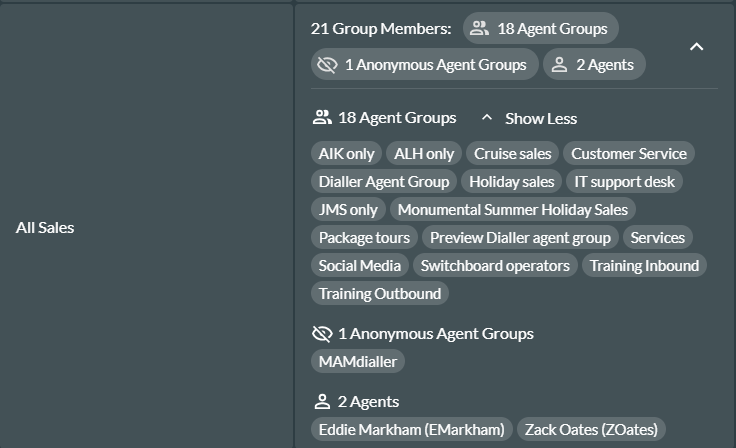
The number of members assigned to the agent group and the type of member. Apart from agents, group members could include nested groups (other agent groups assigned to the agent group) and anonymous agents (typically agents in third-party call centres). |
- To see individual group members, click on the Down Arrow
 next to the agent group you want to view.
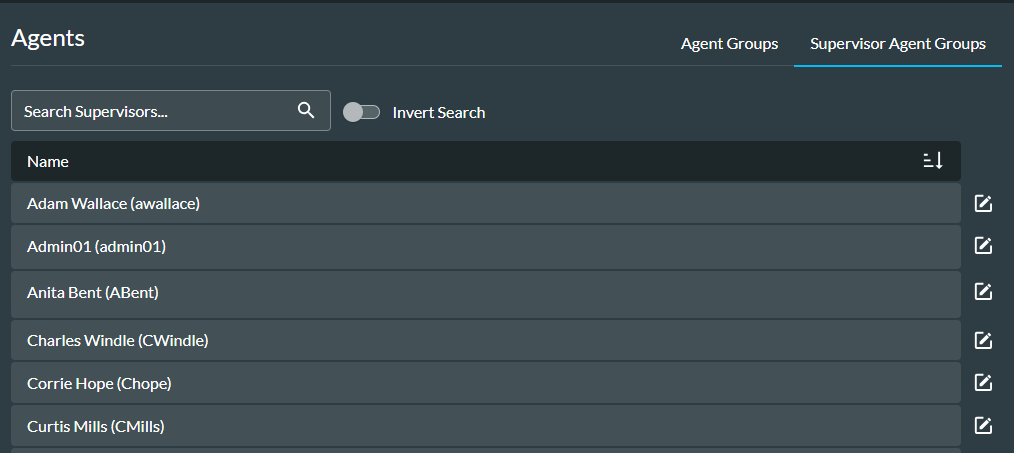
View Supervisors
- Navigate to Agents > Supervisor Agent Groups.
The names (and usernames) of any existing supervisors are displayed and you can use the search field to filter the list.