Apply a Time Schedule to a Queue
You can:
- Deny entry to a queue according to date and time (for example during out of business hours at a particular site)
and/or
- Control the routing of queued contacts to agents according to date and time.
Deny Entry to a Queue at a Specified Date/Time
You must apply a time schedule to a queue's ACD treatment:
|
|
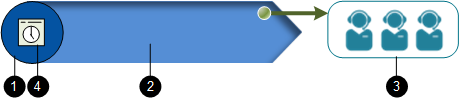
1 Treatment 2 ACD queue 3 Agent groups 4 Time schedule on treatment |
- Create a schedule by selecting Services > Time of Day Services > Add Time of Day Service.
- Name the service and then, in the Specify Actions panel, select the target route for contacts who arrive at the queue at a date and time at which you want to deny entry.
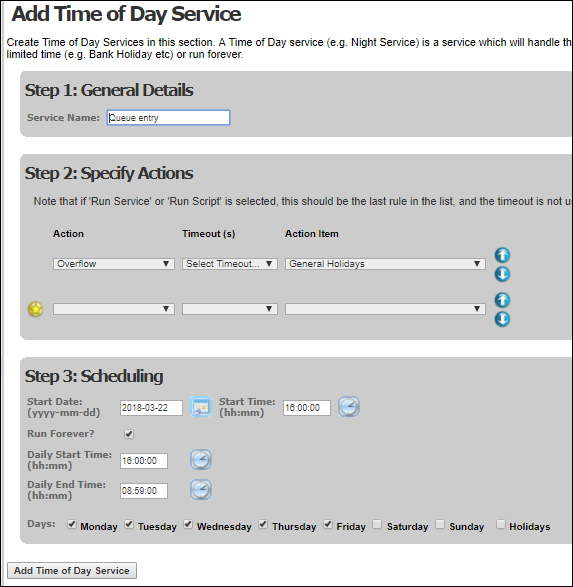
- In the Scheduling panel, define the time period during which queue entry should be denied.
Note: holiday dates can be defined by selecting Services > Time of Day Services > Configure Holidays.
- Click Add Time of Day Service.
- Select Services > Time of Day Services > Time of Day Mapping.
- On the Time of Day Service Allocation screen, select the time of day service schedule just created.
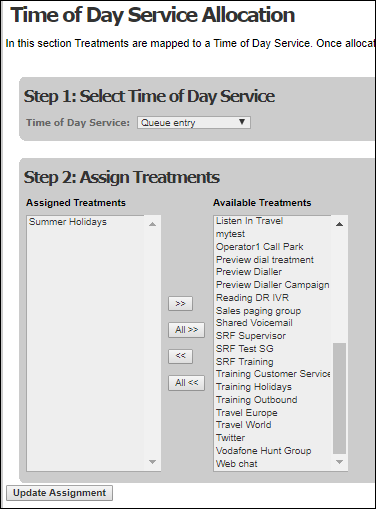
- In Assign Treatments, select the ACD treatment(s) that point to the queue(s) to which you want to apply the schedule.
- Click Update Assignment.
Control the Routing of Queued Contacts to Agents
You must create the schedule and then assign it to a queue's hunting rule.
|
|
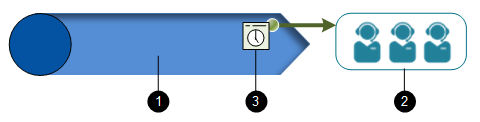
1 ACD group 2 Agent group 3 Time schedule on hunting rule |
- Create a schedule by selecting storm Contact > Queues> Add Matching Rule Schedule.
- On the Add Matching Rule Schedule screen, name the schedule and then select Add Schedule.
- In the Scheduling Criteria panel, define a time band during which the hunting rule will apply.
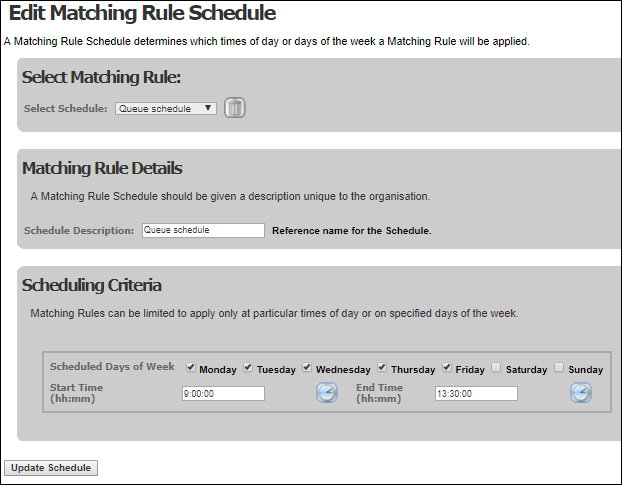
- Click Update Schedule.
- Add further time bands as necessary.
- Select storm Contact > Queues> Edit Queue.
- Select the target queue.
- Select the desired hunting rule's Edit
 button.
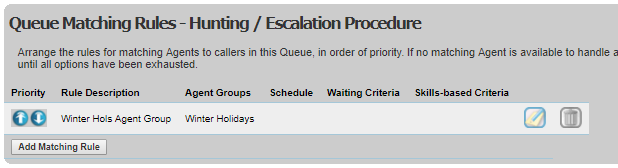
- On the Edit Matching Rule screen's Scheduling Criteria panel, select the schedule just created.
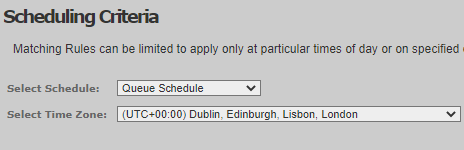
Note: the time zone of the organisation to which you are logged in is displayed here and used as the default. If you select a different time zone, the system applies the times you enter with reference to the time zone selected for the schedule instead.